E4 | Washer Dryer Relocation | Ask This Old House
Season 24 Episode 4 | 23m 42sVideo has Closed Captions
The importance of hearing protection; installing a stacked washer dryer unit in a closet.
Kevin O'Connor meets with an audiologist to discuss the importance of hearing protection, especially when it comes to power tools and impact noises; Richard Trethewey, Nathan Gilbert, and Heath Eastman team up to help a couple age in place by relocating their washer and dryer to the main floor. Together they modify a linen closet to install a stacked washer dryer unit.
Problems playing video? | Closed Captioning Feedback
Problems playing video? | Closed Captioning Feedback
Funding for Ask THIS OLD HOUSE is provided by The Home Depot and Renewal By Andersen.
Support provided by:

E4 | Washer Dryer Relocation | Ask This Old House
Season 24 Episode 4 | 23m 42sVideo has Closed Captions
Kevin O'Connor meets with an audiologist to discuss the importance of hearing protection, especially when it comes to power tools and impact noises; Richard Trethewey, Nathan Gilbert, and Heath Eastman team up to help a couple age in place by relocating their washer and dryer to the main floor. Together they modify a linen closet to install a stacked washer dryer unit.
Problems playing video? | Closed Captioning Feedback
How to Watch Ask This Old House
Ask This Old House is available to stream on pbs.org and the free PBS App, available on iPhone, Apple TV, Android TV, Android smartphones, Amazon Fire TV, Amazon Fire Tablet, Roku, Samsung Smart TV, and Vizio.
Keep Exploring


This Old House Insider Newsletter
Get This Old House exclusive stories, tips, and behind-the-scenes information delivered right to your inbox every month.Providing Support for PBS.org
Learn Moreabout PBS online sponsorshipKevin: On "Ask This Old House," our experts travel across the country to answer questions about your house.
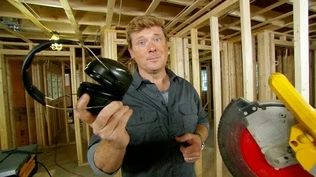
♪♪ Today we learn about the dangers of decibels and the importance of hearing protection when working with tools.
Steve: We got some peaks up above 120 decibels.
Kevin: Then, it's a team effort when Richard, Heath and Nathan help a couple relocate their laundry from the basement to the first floor.
Richard: So, we'll be able to dock right onto that.
And I'm gonna just push to you.
Heath: Okay.
There we go.
Kevin: On "Ask This Old House."
Kevin: Steve, nice to meet you.
Steve: Hi, Kevin.
Nice to meet you.
Kevin: Yeah.
Thanks for coming to our little workshop here.
Not often we have a doctor in the house, but in this case, it's perfect, a doctor of audiology, 'cause we are exposed to loud noises all of the time on the job site.
What are the effects?
How does it work?
What's going on?
Steve: Yeah.
So, there are many different types of hearing losses and causes of hearing loss.
But like you said, what we're talking about here is what's known as sound-induced hearing loss, and more specifically, sound-induced hearing disorders.
And I make that distinction because, unfortunately, with hazardous sound exposure, it's generally a packaged deal where you don't just get hearing loss.
Not that that's trivial or something that you can shrug off, but we also get other issues, such as tinnitus or "tin-nite-us," which is a ringing or buzzing noise that generates inside our head, not from the world.
Kevin: I know it well.
Steve: I have it, too.
But what's actually causing the injury is we have these specialized cells inside of our ears, and there's around 15,000 of them per ear.
And that's all we get.
They do not repair themselves.
They do not heal.
And as of right now, we don't have any pharmaceutical or medication that can help repair those cells.
They're working on it, but we're not there yet.
Kevin: Alright, so, let's talk about the damage.
'Cause not all noises are the same, right?
They're not all as bad or as good as other noises.
Steve: Very true, and that's one of the things that makes this concept of just sound exposure difficult -- because hazardous music exposure is a little bit different than hazardous, like, construction or tool sounds.
And even within, you know, power tools, there are differences between a table saw and a hammer.
Kevin: Right.
And you measure sound by...?
Steve: So, we use decibel, or that's the unit of measure for sound.
And the range of loudnesses that we can perceive is something that's difficult to wrap your head around.
So we use a decibel scale to take this very broad range and condense it into roughly a zero to 120 decibel scale.
So, zero dB SPL is generally regarded as the threshold of hearing -- so, the softest sound most people can hear before we damage our ears.
And that scale goes up to around 120, 130 decibels, and that's known as the threshold of pain.
Kevin: Oh, interesting.
Steve: Now, NIOSH, which is the National Institute for Occupational Safety and Health, and they're the ones that do all of the research around occupational noise exposure, they would say you have 15 minutes... Kevin: Ohh.
Steve: ...only 15 minutes before you have fully exhausted your system.
Kevin: That's a big difference in just that 15-point change from 85 to 100.
Steve: Absolutely.
Kevin: Before we get into hearing protection, is there a way that you can demonstrate to us what the levels are for different tools?
Because we don't just use something like this.
You know, we use all types of tools.
And I'm just wondering, you know, who are the big offenders?
Steve: Sure.
So, the easiest way to do this is with a sound level meter.
And fortunately nowadays, everyone has, I guess, the power to have a sound level meter because there are free apps for your phone.
Kevin: Oh, really?
Steve: So we can use the NIOSH SLM app, which comes from the National Institute for Occupational Safety and Health.
And it's a very educational app.
It works well with iOS.
And we can use that to get a rough sense of all the tools around us.
It's of course, not as accurate as a scientific model, but it's something we all have access to.
Kevin: Well, if you've got the phone with the app, we got the tools, so... Steve: I do.
Kevin: You break that out.
I'll start grabbing some stuff.
Let's see what we should start with.
Steve: Alright, so, let's take a listen to a miter saw.
Kevin: Okay.
And why are you all the way up there?
Steve: I'm just trying to get it closer to my ears.
Since that's where we're hearing, it's a good place to measure.
Kevin: Okay.
So, let's see what we got.
[ Miter saw buzzing ] [ Buzzing stops ] How'd we do so?
Steve: So, some measurements over 100 decibels.
Kevin: Really?
Steve: Yeah.
Kevin: Damage.
Steve: Yeah.
Well, around 15 minutes is what you would have exposed to sounds like that before you've hit your daily dose.
Now let's try a drill.
Kevin: You know, I know how loud the impact drivers are, but just a regular drill driver, I'm curious to see what you get.
[ Drill whirring ] Steve: So, we have around 85, 86 decibels.
Kevin: So, use it for an entire day, you've used up your allotment.
Steve: Right.
Which we're generally not gonna be drilling the whole day, but that combined with everything else, it could definitely add up.
So, even a hammer is louder than you might think.
Kevin: Let's find out.
Ready?
[ Hammer strikes ] Steve: Yeah, so -- Kevin: How bad?
Steve: We got some peaks up above 120 decibels.
And again, that's at a point where you should really never be exposed to that sound.
And it's worth noting that this is just a free app.
It's a cellphone.
It's not perfectly accurate.
But it does go to show how loud something as seemingly trivial as a hammer is.
Kevin: That's the most frightening thing because I often think of hearing damage from that.
I rarely am actually wearing hearing protection just to hammer away.
Steve: Absolutely.
Kevin: So that's a disappointing number to see.
Steve: Yeah.
I think we've all said that, like, "Oh, I'm just hammering a nail.
I don't need to wear hearing protection."
But in reality, you do because that sudden burst of energy can also be even more hazardous than a loud, continuous sound.
Kevin: So, let's talk about hearing protection.
A lot of different kinds out there.
You got preferences?
Steve: Sure.
Well, nowadays, there are many fantastic earplugs that we can use.
And it kind of comes down to what you're using them for and then what fits your ears.
Kevin: Mm-hmm.
Steve: So, over the ear, or earmuff-style, hearing protection like this works very well because it tends to offer more consistent sound protection.
Kevin: Okay.
Steve: And even ones like this offer an active element to the noise reduction, so you can still hear people speak, and then they will drop the volume when a loud sound occurs.
Kevin: It's a really nice feature.
Steve: Yeah.
Kevin: Okay.
Steve: Our typical foam earplugs -- they work very well.
The one difficulty with them is people tend to get them in their ears improperly.
And that's what you'll see, where they're sticking in, doing almost nothing.
Kevin: Just hanging out.
Steve: That's right.
Kevin: So, in terms of, like, technical efficacy, are these similar if they were both worn properly?
Steve: Yeah, so, they have a similar noise reduction rating, or NRR, if worn properly.
And you're doing it right now, where you generally have to roll them down very thin, pull your ear back and up, and insert it to the point where you almost don't even see the earplug sticking out.
Kevin: Right, and then let it expand a little bit.
Steve: Right, let it expand.
Kevin: But a lot of people don't do that, or they don't do it for very long.
Steve: That's right.
And one other issue with earplugs like that is they're passive, so they're going to bring down all sounds equally.
And then if you go to communicate with someone -- ask someone for a drink at the bar or someone speaks to you -- you can't hear them, so you tend to take them out.
So, that's where newer hearing protection, like some advanced earbuds and the earmuffs that we talked about that offer an active element where you can still hear someone speak and then they reduce the volume when it occurs.
Kevin: So, the things that we're using to listen to our podcasts and our music you're saying could be used effectively in the workshop?
Steve: Actually, yes.
Yeah, I've used it in the workshop.
I've used it at very loud rock concerts and walked away without any ringing, buzzing, or fuzziness in my ears.
Kevin: And I don't recognize this one.
What's going on there?
Steve: So, this is just a case.
You know, there's so many caveats with hearing protection, and I tend to think the best earplug is the one you are actually going to wear.
And since most people don't obsess over hearing like audiologists do, it's very easy to leave them at home while you're going out.
So the way to mitigate that and make sure that you always are ready to protect your ears is to just get a metal keychain carrying case.
Kevin: Yeah.
Steve: Put your $20 to $40 earplugs in there, and then you'll always have them with you, whether you go to a festival and there's a band or a loud restaurant.
Kevin: So, the best hearing protection is the hearing protection you have and the one you wear.
Steve: That's right.
Kevin: Awesome.
Well, thank you, Doctor.
We appreciate the info.
Steve: Thanks for having me on the show.
Kevin: You got it.
Richard: Hello there.
Jim: Hello there.
Richard: Nice to see you.
Jim: Hi.
I'm Jim, and this is my wife, Michele.
Richard: How do you do?
Richard.
Nice to see you.
Michele: Hi, Richard.
Jim: Thank you for coming.
Richard: Glad to be here.
You wrote us about aging in place, something that I'm starting to get used to.
Jim: Aren't we all?
Yeah.
So, we know that we're not getting any younger.
I'm 70 years old.
And we want to eliminate the stairs in our life.
Richard: Okay.
Jim: So, we're gonna live on this first floor.
Richard: Okay.
So, you got the bedroom, master -- Jim: Yeah.
Richard: The primary bedroom right down here, okay, for you guys.
Michele: Yeah.
They say that if you're going to -- thinking about aging in place, that you do it when you can, not when you have to.
Richard: Have to.
Yes.
Michele: And we don't have to right now, and, God willing, we won't have to for a long time.
Richard: Right.
Jim: We started renovating the bathroom with that in mind, put in safety bars and things.
Richard: Great.
Jim: And then we thought about the laundry.
Richard: Ah.
'Cause that was -- The laundry's downstairs now?
Jim: It's down in the cellar.
Richard: Okay.
Jim: And we'd like to eliminate that, if that's possible.
Richard: You want to get rid of those stairs.
Michele: Yeah.
Jim: Yes.
Richard: Alright, so, you're doing some of this work yourself?
Jim: We did.
Michele: A little bit.
We're in mid -- We're in mid-process.
Jim: And we got stuck... Michele: Yeah.
Jim: ...because we wanted to convert the bathroom closet perhaps into a laundry room.
Richard: Okay.
Jim: And that's beyond our level.
Richard: Okay.
Well, I think I came just in time then.
Jim: Yes, you did.
Michele: You did.
Richard: Let's check it out.
Michele: Alright.
Jim: Okay, Richard, this is the bathroom.
As you can see, we started our renovation.
Richard: You did.
Jim: We had a tub here, and we knew that at some point, we weren't gonna be able to climb up and get in and out of it, so we took the tub out.
Richard: So, a nice low curb right here and that waterproofing material we use all the time.
Perfect.
Jim: And we had a sink that had a cabinet.
Richard: Yep.
Jim: And so if we were ever in a wheelchair... Richard: Yep.
Look at that.
Jim: ...we wouldn't be able to get underneath it.
Richard: That's hung off the wall -- great.
Jim: Yep.
And an ADA-compliant toilet.
Richard: Right.
Does that have the bidet seat, too?
Michele: Yep.
Jim: It does.
And this is where the closet was.
Richard: Alright.
Jim: And that's what our question was -- can we put a washer and dryer in this closet?
Richard: Well, you can probably physically find a way to stack it in here.
You've got a drain line right here.
That looks like you could tap into that for a trap.
And there's hot and cold piping.
You could tap into that.
And then it looks like there's actually a space we can get the dryer vent to outside right there, right above the roof of the shower.
That's great.
So, you're not too bad in my world, you know?
But you're gonna need electrical for the dryer.
And then your carpet -- you got plenty of carpet.
You know, I have in my phone the rest of our team, you know, like Heath the electrician and Nathan the carpenter.
How about we call them and make this a whole team effort?
Jim: That'd be wonderful.
Richard: Alright.
Michele: I'd love it.
Thank you.
Richard: Let's get him on the phone.
Let me see if they take my call.
Michele: [ Laughs ] Richard: They have caller ID.
[ Laughter ] Alright, every day is Christmas.
Look who I found.
[ Laughter ] The troops are here.
Heath: How you doing?
Richard: Heath, Nathan.
Heath: Nice to meet you guys.
Michele: Heath, Nathan.
Welcome.
Nathan: Nice to meet you.
Michele: So glad you could come.
Nathan: Thanks for having us.
Richard: So, as I mentioned, we got -- The bathroom's underway.
We're trying to fight the washer and dryer, and the plumbing's pretty straightforward, but we need you guys.
Heath: Yeah.
So, for me, first thing I want to take a look at is the panel, see if we have physical space and what it's gonna take to get the new circuits up there.
Jim: I can show you that.
Heath: Alright.
Nathan: I'd like to look at the space given and see what we can do.
Michele: I can hook you up.
Nathan: Okay.
Richard: Lead on.
Michele: Alright.
Alright, Nathan, welcome to the bathroom renovation.
Nathan: You guys are well on your way here.
Michele: We are.
Nathan: This looks great.
Michele: Yeah.
Nathan: So, we're talking about a washer/dryer unit, right?
Michele: Yep.
Nathan: And it looks like this is the space that you want to put it.
Michele: This is what we were hoping for, yeah.
Nathan: Alright, so, I'm sure you guys have already done it, but I'm gonna get caught up and take some measurements here.
We want to make sure that we have the proper clearance for the washer/dryer unit.
It looks like we have plenty of space, but I'm thinking about the doors.
There's a lot of doors going on in here.
I see your hinge is mortised here.
This door is gonna open in front of the closet, right?
Michele: Yeah.
Nathan: You can swap the hinges over to here and change the swing of the door and open it in to the left, but then you still have a door here to navigate.
And then once you open that, you have the doors of the washer and the dryer to navigate, right?
Michele: Right.
Nathan: So it's really tight with the basket.
What's nice, though, is we can see the back side of this wall, all that real estate that leads out to the... Michele: Hallway!
Nathan: Hallway.
Perfect.
Michele: Ah, yeah.
Nathan: Look at this.
Michele: Oh, look at that.
Nathan: Probably fit probably a 2x4.
6'6".
That would match the existing.
Get some new maple trim, blend everything.
It would almost be like a paneled wall, really clean look.
I see we do have a thermostat here to dance around, so Heath could probably move that for us.
Michele: Excellent.
Nathan: Alright.
Michele: Alright.
Heath: Alright, Jim.
So, this is the service coming in.
It looks like you got a new panel?
Jim: Yes, we did.
Heath: Okay.
So, a new panel and... 200-amp service?
Jim: Yes.
Heath: Okay.
It looks like this was probably existing beforehand, seeing how you have space here... Jim: That was put in with the air conditioning.
Heath: Got it.
So, that was there.
So now we have plenty of room here to grow if we need to.
Looks like we have our existing dryer circuit and our washer's in here somewhere, as well.
Am I able to reuse those circuits for the new stuff upstairs, or are you thinking of keeping your washer/dryer in the basement?
Jim: No, we're gonna keep what we have down here.
Heath: You're going to keep the machines downstairs?
Jim: Yes, we're gonna use it for large bulk items and things that we don't want to drag through the house.
Heath: That's actually not a bad idea.
I see that more and more where that's an option.
You can actually use this, especially down in the basement, come through the bulkhead.
Dirtier items, if you had pets, anything heavy that you want to put down there and not drag through the clean house upstairs.
That works out pretty well, especially for you.
You have plenty of room to grow.
So, what we're gonna do is duplicate the circuits you already have.
We're going to put in a 20 amp, 120-volt circuit upstairs for the washing machine, and this double 30 we're gonna put in for the dryer, as well.
Those two will plug in for the new machines upstairs.
That's great.
So we can go ahead and do that.
Let's go find Michele and Nathan, and we'll see what we have to do upstairs.
Jim: Okay.
Richard: Alright, a little huddle up.
What do we know?
Nathan: I think we found a good place for the washer/dryer unit.
We're gonna come in through the hallway, put a door in.
Richard: Off -- That's pretty cool.
Nathan: Yeah, right off the hallway.
Richard: A lot of people just sort of jam it off behind that door.
Nathan: I think we can make it work off the hall, so it's gonna be nice.
Michele: Yeah, I like that idea.
Jim: I like that idea a lot.
Nathan: Only thing we need to do is move the thermostat.
Heath: I think we can handle that.
Richard: I'll just cut the wire.
[ Laughter ] Heath: You wouldn't be the first.
Richard: Yeah, that's right.
Heath: We have a wide-open basement right below it, so it should be easy enough to pull down, relocate somewhere else in the hall, pull it up in a nice location, be done with it.
And we have a new service, a new electrical panel, new 200-amp service, plenty of physical space for new breakers so we can pull the lines over and come right up.
Richard: And you can still keep the washer and dryer... Heath: Exactly, so we can leave the existing washer/dryer, add the new one.
Richard: You can do laundry on the side.
[ Laughter ] Alright, well, if we're gonna jam that washer in, I worry about those hoses over time.
They're in a place you can't get at it, so we got to think about how to just have some access to be able to turn that water off -- so either valves down in the basement can get at or an access panel so we can get in there.
And I think then we could be fine, I think.
Heath: I think it'll work.
Richard: Alright.
So, we ready?
Nathan: Ready.
Richard: Put it in here gang.
You got the team.
Let's go.
Let's go!
Michele: Break.
Heath: Before I remove the thermostat, I want to go ahead and kill power to the boiler and its controls.
Alright, now that the boiler is off, I'll take the thermostat off.
Next I'll just take the wires out.
Then I'll get the back plate out of the way, and then I'll jump downstairs and pull the wires down.
Nathan: I'm going to get started inside the closet by removing this rock lath.
♪♪ Now we're gonna get started on the hallway.
I'm gonna start by removing the trim, the baseboard, and then I'm gonna get going on the rock lath.
♪♪ ♪♪ ♪♪ ♪♪ Heath: Alright, now that we have the location of the washer/dryer going on the first floor, I can start to plan a path to running my wires.
And as you can see, we have a lot going on in the ceiling.
We have a bunch of pipes going in every direction, existing wiring, line voltage, low-voltage light fixtures, a little bit of everything.
So it took a little while to find a path, but I think we have it.
And I'm pulling two different cables.
The first one I'm gonna pull is a 12/2 NM cable.
This is gonna be the 20-amp, 120-volt circuit for the washing machine that's gonna go upstairs.
The second one I want to pull is gonna be a 10/3 NM cable.
This is gonna be a 240-volt, 30-amp circuit for the dryer up here, as well.
Now I'm gonna turn the main breaker to the house off and lock this out so no one can turn it on while I'm working on the panel.
Now that the wires are in the panel, stripped, the grounds are made up, and the breakers are in place, we'll just make the connections to the breaker.
Nathan: We're gonna start framing our rough opening.
This original partition wall here was framed with 2x3 stock, so we're gonna go back with 2x3 stock.
We're gonna go with a flush threshold so the washer and dryer can roll in nice and easy.
Now I'm gonna set the jamb for the door.
I'm gonna use some cedar shims to plumb it, and then I'm gonna hang the door after.
Richard: Alright, we have a few things to fit into this wet wall.
We've got, first of all, this washing machine valve box right here.
And that's gonna mount into the wall.
And you can see it's got a single-acting shutoff valve right here -- and I love that -- so you can take the pressure off the hoses.
And it's got a place for the drains, and that's gonna be right about there.
And now we'll have the drain.
We're gonna come off here with 2-inch, and we're gonna come over with a trap.
And it has to be 2-inch nowadays for any standpipe.
And then the hot and the cold will be right here.
We're gonna come over -- We're gonna come over and feed our washing machine valve.
But we're also gonna tee off because in the future, we have to put that shower valve in that the installers will do over here.
So we'll leave this capped off.
We also have the dryer vent that has to fit into this very same wall, so you have to be sensitive to that.
And then he's got to put his electrical somewhere here, and it all has to fit.
Starts by turning off the water.
♪♪ ♪♪ ♪♪ ♪♪ I got it, Nathan.
Good.
♪♪ ♪♪ ♪♪ So, this is the interesting part here.
It's a telescoping vent, and we got the issue of the shower valve right here.
So, this fits narrow.
And now we get it to right here.
And I know that the dryer vent tapping on the back of the dryer is at 40 inches.
Nathan: Oh, perfect.
Richard: So, look at that.
So we'll be able to dock right onto that.
And I'm gonna just push to you.
Heath: Okay.
Richard: There we go.
Heath: Keep swinging.
Keep swinging.
Richard: You got door hinges over here.
♪♪ ♪♪ Richard: Keep coming.
Keep coming.
Hold.
Hold.
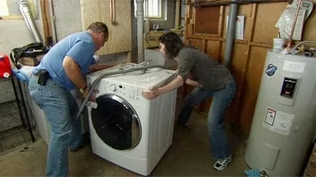
I'll tell you, Jim -- look at the match that Nathan did.
That's what really makes it just disappear, this hallway, doesn't it?
Jim: Yeah.
Did beautiful, beautiful work.
Richard: Yeah.
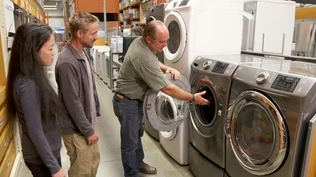
And I love the unit.
You picked this baby out, right?
'Cause I've had stackables before, you know, the bottom and the top unit, but it turns out that the controls are, like, way up there and way down here.
This is nice in the middle.
Jim: It's very convenient 'cause, you know, Richard, as we get older, we're not gonna get any taller, and we wouldn't want to be reaching way up there for the controls.
Richard: Am I gonna shrink?
Jim: Yes.
Richard: Oh, no.
Jim: We all are.
Richard: I felt so tall.
Alright, I heard you're the laundry guy.
Jim: I am.
Richard: Well, this thing -- I've been sweating for a couple days with this, so I'm gonna leave it with you, okay?
Alright, let's go find the boys.
Jim: Okay.
Nathan: But it all worked out.
Michele: It did.
Richard: Oh, Michele, you married a pro at laundry.
He's already got a white load going.
He's unreal.
Michele: He's good.
Richard: He's really good.
Michele: He is.
He is.
Richard: Well, we hope you guys enjoy this thing.
It's been really fun.
Jim: Thank you.
Michele: We did.
And we really appreciate all -- every piece of everything you guys did.
Richard: It's a great project.
Michele: Thank you.
Richard: The boys did it.
Nathan: Hold on.
Little bit of homework.
Richard: Okay.
Nathan: Let's not rush this.
So, you guys are gonna finish the bathroom.
Little access panel on the side there so you can do the shut-offs.
Please also label any of the shut-offs so if you have guests, they know.
Staining -- a little bit of staining to finish everything up.
And just a new doorknob that matches the existing.
Alright?
Michele: Got it.
Heath: And thank you guys so much for being great fans and writing in for this project.
That was wonderful.
Happy to come and do it, and I'm glad it worked out so well for everyone.
And if you're a fan of the show and you want to take a look at your house, write in to us and let us know.
For "Ask This Old House," I'm Heath Eastman.
Nathan: I'm Nathan Gilbert.
Richard: And I'm Rich Trethewey for "Ask This Old House."
Alright, who's driving?
Heath: I thought you were.
Richard: Alright, I'll drive.
Nathan: I'm gonna sleep in the back seat.
Kevin: Next time on "Ask This Old House," Lee helps a homeowner create some privacy using arborvitaes.
Lee: What do you think?
Woman: It's beautiful!
I love it!
Kevin: Then Mark is talking fireplace tools and the function of each one.
And this simple rack will help you organize your storage bins.
And Tommy will show you how to build it.
Tom: Just check it real quick, see if it's square.
Kevin: All that on "Ask This Old House."


- Home and How To

Hit the road in a classic car for a tour through Great Britain with two antiques experts.


Support for PBS provided by:
Funding for Ask THIS OLD HOUSE is provided by The Home Depot and Renewal By Andersen.