E4 | Carolina Comeback | Waterproof Work
Season 47 Episode 4 | 23m 42sVideo has Closed Captions
Kevin lends a hand at the Asheville locations with waterproofing, roofing and framing.
In Swannanoa, Kevin O'Connor helps Jim's brother Bill waterproof the bathroom, including around the shower window. Up in North Asheville, he meets with roofers JD and Jayden where the new shingles and flashing are installed with wind and water protection. In East Asheville, Kevin works alongside builder Will to remove rot, reinforce the frame, and replace the damaged boards of Paula's deck.
Problems playing video? | Closed Captioning Feedback
Problems playing video? | Closed Captioning Feedback
Funding for THIS OLD HOUSE is provided by The Home Depot and Renewal By Andersen.
Support provided by:

E4 | Carolina Comeback | Waterproof Work
Season 47 Episode 4 | 23m 42sVideo has Closed Captions
In Swannanoa, Kevin O'Connor helps Jim's brother Bill waterproof the bathroom, including around the shower window. Up in North Asheville, he meets with roofers JD and Jayden where the new shingles and flashing are installed with wind and water protection. In East Asheville, Kevin works alongside builder Will to remove rot, reinforce the frame, and replace the damaged boards of Paula's deck.
Problems playing video? | Closed Captioning Feedback
How to Watch This Old House
This Old House is available to stream on pbs.org and the free PBS App, available on iPhone, Apple TV, Android TV, Android smartphones, Amazon Fire TV, Amazon Fire Tablet, Roku, Samsung Smart TV, and Vizio.
Keep Exploring


This Old House Insider Newsletter
Get This Old House exclusive stories, tips, and behind-the-scenes information delivered right to your inbox every month.Providing Support for PBS.org
Learn Moreabout PBS online sponsorshipKevin: Today on "This Old House," we're visiting the largest privately owned estate in the country that's also a top tourist attraction here in Asheville.
Bill: We're trying to get all the tile waterproof board up, and we're gonna use a waterproof sealant.
William: We took the old deck off, and we discovered a little bit of rot here.
♪♪ Man: Ahh.
That's it.
♪♪ ♪♪ ♪♪ Kevin: Hey, there.
I'm Kevin O'Connor, and welcome back to "This Old House" and to beautiful Asheville, North Carolina, where we are working on restoring five homes damaged by Hurricane Helene, a hurricane that damaged tens of thousands of homes in this area.
But it also damaged infrastructure and businesses, big and small.
And many of those businesses cater to tourism.
In fact, 14 million people come through Asheville every year to take advantage of the great food, outdoor activities, and, of course, places like this.
That is the Biltmore, America's largest private residence, also a National Historic Landmark.
And it was built by George Vanderbilt.
The family moved in Christmas Day 1895.
And then the home was opened in 1930 to the public.
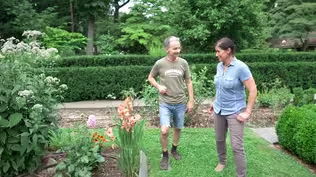
And as you can see, well, people are back and visiting the home, as well as the magnificent gardens down below, which is where I think we'll find our gardener extraordinaire, Jenn.
♪♪ So, have you had some time to look around, Jenn?
Jenn: I mean, I've been exploring.
This place is 8,000 acres.
Kevin: That's crazy.
You know who it's designed by?
Kevin: Who?
Jenn: Frederick Law Olmsted.
Kevin: Your guy!
Jenn: Yep.
He's the father of American landscape architecture.
Kevin: He did Central Park, right?
Jenn: Yep.
Park Slope.
The Emerald Necklace in Boston.
Kevin: Awesome.
Jenn: I'm very excited right now.
These are azaleas.
Kevin: Oh, man.
We came at the perfect time.
Jenn: I know.
It's just this magenta pop of color.
Kevin: Spring is on in Carolina.
Jenn: I know.
And this is a Cornus florida, one of my favorites.
It's a dogwood tree.
Kevin: Oh, yeah.
Jenn: Look how beautiful.
Kevin: Love that.
Jenn: And then back there we have the pink one, Cercis canadensis.
Kevin: My wife's favorite tree.
Jenn: Yep.
Eastern redbud.
Kevin: That's awesome.
Jenn: So, I mean, there's just pops of color everywhere throughout.
Kevin: It just goes on forever, too.
And it feels natural, but you can tell that it is just well-loved.
Jenn: Exactly.
And there's always something blooming throughout the seasons.
Everything's timed.
Kevin: Let's see what's down here.
Jenn: Okay.
Kevin, this is the Walled Garden.
Kevin: Wow.
Jenn: Look at it.
It's four acres.
Kevin: Just keeps getting better.
Jenn: Oh, it's probably one of the most prominent gardens here.
Kevin: And what are we featuring this season?
Jenn: It's tulips.
Kevin: Ah!
Apparently, huh?
Jenn: Happy spring.
Kevin: I like tulip season.
Jenn: Spectacular.
Kevin: You're in heaven, aren't you?
Jenn: Oh, my gosh.
I think I'm gonna spend all day here, if that's okay.
Kevin: Yeah, you probably will.
Yeah, fine.
I can't.
I gotta go, but enjoy.
Jenn: Yeah.
Kevin: I'm gonna go to the job site.
Jenn: I'm gonna go to the Japanese maples.
♪♪ ♪♪ Kevin: One of our job sites is here in Swannanoa.
This was all built back in the '20s as worker housing for a nearby blanket factory.
And now it's this quaint little neighborhood that, unfortunately, on this low-lying street, all flooded.
Some of the houses, flooding was up to the roof line.
Three houses here have been bulldozed, but the rest are staying, including three homes that we're working on.
So I figured it'd be time to check in with our five homeowners to hear about their progress.
There they are, our intrepid homeowners.
Hey, guys.
Homeowners: Hi.
Kevin: A lot of smiles.
I like to see that.
Hopefully it's a good time to check in on progress.
Cat, how about you?
Catherine: Yeah, we're doing good.
The house is kind of starting to look like a home again.
We've got hardwood floors in, and it just looks beautiful.
Kevin: Awesome.
Jeremy: Yeah, and we got our windows.
We got our tile delivered today.
Pretty excited.
Kevin: Good.
Miah, what do you got?
Miah: Sheetrock is done.
The floors are getting put in today.
Most of my windows are in, so super excited.
Kevin: Love to hear that.
Allie, Jim, what about you guys?
Allie: I'm so excited about the windows.
See all the natural light coming in -- I love it.
Kevin: So how about you, Jim?
What do you got to report?
Jim: We just kind of picked up tile, and my brother came from New Jersey to help me put it in, set it.
That's what he does for his work.
Kevin: So that's good.
I want to check in with him in a little bit.
But, I mean, I'm glad to see the smiles and hear about all the progress.
I would imagine it's probably a little bit more difficult than you guys are letting on.
Like, how are you holding up, I mean, emotionally, and how's the neighborhood holding up?
Catherine: I think we've all experienced a lot, and it's been a real roller-coaster ride.
I think we lost a lot of security with losing our home.
And, um, I also don't think any of us were ready for a home renovation.
But here we are, and I think we're excited about kind of the future and hopeful.
Kevin: Yeah.
Trials and tribulations from you guys, Jim?
Allie: Yeah.
Days still have its ups and downs, for sure.
But, I mean, being together as neighbors, we try to do it every other week get together with the whole street, and it's been nice to rely on each other because we know what we've been through, so... Jim: Yeah, with the house coming along, it's been huge.
But, you know, there's still things to process and the loss of security and just being home.
Allie: Yeah.
Jim: You know it's still a lot of stuff to work through and talk through and just figure out.
Kevin: Yeah, I can imagine.
Well, for what it's worth, I will tell you that we've been through it before with other homeowners and other communities, and I can assure you, we've seen it return to home eventually, so it will happen, so hang in there.
Homeowners: Thank you.
Kevin: And if I'll excuse myself, I'll go check in with Bill.
Jim: Yeah.
Kevin: All right.
Hang in there, guys.
Allie: Thank you.
Kevin: You can see in here the progress that Jim and Allie were talking about.
Their windows are in.
All of the board is up.
The house has been a little bit reconfigured from original, but not too much.
And as promised, down here at the end of the hallway, we've got the primary bathroom and brother Bill.
Bill: How you doing?
Kevin: I'm doing well.
We appreciate you showing up to help out.
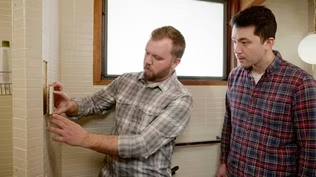
Bill: So we're trying to get all the tile waterproof board up, work around the window.
We've got a little interesting situation that we don't always run into.
Kevin: Yep.
Bill: But if you want to hand me that board, we could probably fit that up here.
Kevin: You pre-cut it.
Bill: Yeah.
Just watch the corner, because I've got that backboard loosely in place.
Kevin: And so we don't often have windows in a shower.
So we're worried about waterproofing more than usual with this.
Bill: Yes.
Kevin: Board is around it.
How do you treat the perimeter?
Bill: So we have a waterproof fabric that we use a caulking that we bond to the window and to the fabric.
Then we embed it in thinset that is made for that purpose and wrap that around, similar to how you would do a shower pan waterproofing with the membrane.
Kevin: So we need a couple other pieces of the board.
Bill: And also this only gets membrane.
This gets membrane.
The side one gets shimmed out.
If you want to pass me those smaller ones on your side.
Kevin: Okay.
Bill: All right.
Kevin: So you're saying these go in like this?
Bill: Yep.
And then we will waterproof membrane around and again use that caulking to adhere that waterproof membrane to the window frame.
Kevin: Roger that.
♪♪ Bill: If you want to get the rest of the ones up high, I'll go mix up some thinset.
Kevin: Sounds good.
♪♪ Bill: All right, so we got our thinset mixed up.
We're gonna put some up here and work it in.
And then I'm gonna notched trowel that.
Kevin, if you could just take that trowel, grab a little bit, and just spread it on there like you're putting mayo on a sandwich.
All right, we're gonna stick this in here, and then we're gonna see if we're plumb and square.
That looks pretty good.
I think we're ready for screws there, but we could mud up the other side and get that ready.
♪♪ All right.
Give it a little push.
I did put a lot extra in there, and some might ooze out when we screw it in.
And we're gonna have to be careful not to over-torque it to throw us out of plumb.
♪♪ All right, so now we've got to put banding in because we have all these seams here and they're not waterproof.
So we have a waterproof fabric that we use a caulking that we bond to the window and to the fabric.
If you could cut them for me in the other room, I have you all set up where you can just pull it out of the box and slice it with a knife on the drywall.
Kevin: Perfect.
Will do.
Bill: And while you're doing that, I'm gonna put our adhesive sealant caulk around our vinyl window because when you have a different material, you need to bond and have a watertight seal and then mortar or thinset on what we installed.
♪♪ Kevin: Okay.
Bill: All right.
You got those ready for me?
Perfect.
Kevin: I do.
Bill: What I've got to do is spread the thinset along here... ...and along here.
All right, Kev, give me a long bottom one.
Kevin: That was the first one.
Bill: And we're gonna embed it into our adhesive sealant and our thinset mortar at the same time.
And I will go back and squeeze this in.
♪♪ We have some outside corners here that I pre-made.
And what we do with them... ...is we fit them here like this at all four corners, and that'll cover everything up, and we'll be 100% waterproof.
Kevin: And installation of those is the same as the side?
Bill: Absolutely.
Yeah.
We just use our notched trowel in the appropriate size, smooth it out, and I'll be ready to go.
Once this cures, this all bonds together, and we'll be waterproof.
Kevin: So it's actually quite a bit of detailing, but when you've got a window in a shower, you want it to be rock-solid waterproof.
Bill: And absolutely a lot to think about about the tile and the layout, because this is gonna be a sample piece of what we're gonna use.
And I'm gonna make custom pieces for here and here.
Kevin: And then your wall will be what?
Bill: This is gonna be stacked three one way and then three the other way.
Kevin: Oh, very nice.
Bill: In, like, a grid pattern that -- my sister-in-law picked that out.
Kevin: Cool.
All right.
Well, Bill, thank you.
Appreciate it.
Good tips.
Bill: I appreciate it, too.
Thank you.
Kevin: Again, we're glad you're here to help us out.
Bill: All right.
Thank you very much.
Kevin: Meanwhile, in north Asheville, the roofing crew is installing a new roof system.
As the crew gets started on the drip edge, I met up with the owner of this operation to hear about the process and then to lend a hand.
JD, nice to meet you.
JD: Kevin, nice to meet you.
Kevin: So I presume you've been busy for the last few months with roofs.
JD: We have been very busy once Helene and the aftermath hit of just the cleanup and trying to get everything back together.
Well, we're glad that you can find some time to do this.
So tell me the process.
I see one half, they're stripping off the old.
How old was it?
JD: So this roof is about 15 years old.
And once we get this half stripped off, we'll get everything back and then dry and the underlayment on.
You see these guys here?
They're starting to put in the drip edge.
And then we went with a waterproofing membrane, putting in the underlayment and getting ready to start the installation of the shingles here.
Kevin: So I know a lot of the damage here was actually trees going through the roof.
Are you putting down the shingles a different way, given the wind situation here, or no?
JD: Yeah.
So we're gonna put the shingles down.
It's gonna go down basically the same application, but we're gonna six-nail application the shingles.
So we'll have six nails.
That's gonna give you an uplift of 130-mile-an-hour winds.
So that's gonna make a big difference here.
If we have another storm like Helene, this will protect that roof from the shingles flying off this roof.
Kevin: And traditionally instead of six, you would do how many?
Typically is a four-nail application.
We like to do a six-nail application just to give that extra wind warranty and extra uplift.
Kevin: Okay.
Well I don't know how much help I'm gonna be, but I'm gonna get up there and throw in with those guys.
Who am I working with?
JD: You're gonna be working with Jayden.
That's my son.
Kevin: Oh.
Nice deal.
Well, you're a smart man, putting him up there and staying down here.
JD: Staying down here.
Thank you.
Kevin: I appreciate it, sir.
Thank you.
Jayden, how are you?
Kevin.
Jayden: How are you?
Jayden.
Kevin: Nice to meet you.
I'm gonna be, uh, slowing you down today.
Jayden: Okay.
Kevin: Working with you.
Your dad was telling me the layers that we've already got up.
What have you got next?
Jayden: So we're gonna get started over here in this corner.
We have step flashing going in.
And then we're gonna start doing the kick-out diverters.
Kevin: The step flashing will go where the roof intersects the sidewall.
So before you bend that, let me just make sure I understand -- this is not your step flash.
When you say "kick-out," you're trying to create something that will literally take the water coming off this roof and kick it away from your brick facade.
Jayden: Yep, yep.
Kevin: And you're aiming it where?
You want it to go... Jayden: We want it to go right into the gutter.
Kevin: Right.
Jayden: So without this there, if we were to just put a piece of step flashing in, water is gonna just continue off the roof.
Kevin: Yeah.
And eventually it's just gonna come running right down that brick facade.
Jayden: Yep.
It'll get moldy and nasty, and you'll have to clean it.
So we're gonna try to prevent that by making this kick-out diverter.
So I just take my tongs and just fold this up a little more than 90 degrees.
And then I like to take some snips, and I like to cut this off.
We're also gonna put another piece of step flashing above this.
Kevin: So that's the idea right there.
That is the step.
Jayden: It is, yep.
Kevin: So you've got one piece of flashing underneath that shingle but over the one before it, or it will be as you go up.
Jayden: Yep.
Kevin: Next piece of flashing sits on top of the next shingle.
Jayden: Yep.
Kevin: Step it.
Jayden: So there's really no way water could ever leak in this wall unless it blew straight up underneath the shingles.
Kevin: So once those are in, you can start working this way?
Jayden: Yep.
♪♪ ♪♪ Kevin: So, Jayden, I've watched you do it a bunch, but I've got to get my head around your nailing pattern here because I'm seeing the six go in, but not evenly spread across.
Can you explain to me your methodology?
Jayden: Absolutely.
So if we're gonna come in with this next shingle here, obviously we're gonna butt this up where it needs to go.
And before we nail this, we've got to think about the next run of shingles coming in.
So as we come in, we'll go ahead and pop this shingle here.
Kevin: Yeah.
Jayden: Now, like the courses below it, there's gonna be a course obviously over top of this one.
Kevin: So you know that there's another one coming in... Jayden: Yep.
Kevin: ...and gonna land... Jayden: Somewhere in this vicinity.
Kevin: Okay.
Jayden: And so we want to stay away from this as far as possible, but still hold the shingle to the roof.
Kevin: So you don't want to see a nail here, here, or this area right there?
Jayden: Yeah.
So we want to try to stay 4 to 6 inches away.
So with this course below it where this shingle lands, we're about five inches away, which is good.
And then this one over here we're plenty far away, so we don't have to worry about this.
Kevin: Which means you're now gonna do one... Jayden: one here, so we're gonna start here.
One.
Kevin: And there's your gun.
Jayden: The width of our gun plus a couple inches.
Two.
Three.
Four.
Five.
Six.
Kevin: Nice.
Very nice.
Jayden: Kevin, another detail we like to try to get right is as we're step flashing up the roof and everything, we'll finish this all out once we get the full roof on.
Kevin: So this flashing detail is not complete?
Jayden: It's not complete, yeah.
Kevin: Because right now, I mean, you can see water could come down and can get behind this.
Jayden: Absolutely.
So what we like to do is we'll take a seal tape, and we'll seal tape it all the way up our step flashing.
Kevin: So that's gonna actually adhere to the brick, pull the step flashing to it?
Jayden: Yep.
Kevin: And I see you got the roller.
Jayden: Yep, so we want to be able to roll this on this brick to get a good adhesion.
Kevin: So that's -- is it temporary for you?
Jayden: It's temporary, yeah.
It'll stay there for the life of the roof, but it's not our main water protection.
Kevin: Which is what?
Jayden: Which is that right there, if you can hand me that piece of metal right there.
Kevin: Okay.
Jayden: So this is our counter flashing.
We just bend this in a metal break, and we'll put a little hem on the edge here.
Kevin: So you guys made this up, right?
Jayden: We did.
Kevin: So there's the piece.
Ninety up top.
Oh, so that's bent over.
That's a hem?
Jayden: Yep.
That's just so you don't cut your hand on it.
Kevin: Yep.
And that's at a 45.
And what are you gonna do with this?
Jayden: So we'll take this, and this is just a little scrap piece, but we'll take this and we'll put it up against the wall.
So we don't want debris and sticks and leaves and stuff to get stuck underneath this.
So we're gonna pull this up off the roof about an inch, giving us a little bit of a reveal on our step flashing.
Kevin: And then the 90 that's sticking out now?
Jayden: So that will be cut into the brick with an angle grinder.
Before we put it in there, we'll put a bead of silicone or some kind of caulking in there, and we'll stick it in, and then we'll caulk it again the top of the leg so it's not detected.
Kevin: This, however, is one of the last things you do.
You're gonna put the shingles on this entire roof.
Jayden: The last thing we do.
Kevin: Good deal.
Listen, man, it's been a real treat.
You know your stuff.
I'm gonna tell Dad he taught you well.
But I appreciate it.
And I'm gonna stop slowing you down and get out of your hair.
But thank you for the lessons.
Jayden: Absolutely.
Thanks for stopping by.
Kevin: You got it.
♪♪ ♪♪ Paula: So, Kevin, a lot has changed since you were here last.
Kevin: Oh, yeah.
Paula: Got the drywall up.
Kevin: Well, that's got to feel good, right?
Paula: It does.
It feels a lot bigger in here.
Kevin: Signs of progress, yeah.
Paula: It's clean.
No mud.
And been picking out some colors.
Kevin: Yeah.
Paula: Trying to decide between this, like, peach and this, like, dusty-pink color.
Kevin: Wallpaper going up somewhere.
Paula: Wallpaper is going in the kitchen above the backsplash.
This is the floor I've picked out for the whole house.
It's a French white oak.
Kevin: That's gonna look terrific.
I love white oak.
So that's all throughout here.
So seating area here, right?
Sort of... Paula: Yeah.
Seating area.
And then a dining room area.
I'm excited to have, you know, people over.
And building in a banquette over here.
Kevin: Very nice.
Yeah.
And kitchen down here.
Paula: Kitchen.
A nice, big new window.
So now I get to see the river.
Kevin: So how are you feeling?
Like, where's your head?
Paula: I feel like I'm about halfway.
Kevin: That's good.
Paula: And I'm doing okay, except when the weather's not good.
Kevin: Ah.
Paula: Yeah.
And it kind of triggers me when it's windy or storming.
Kevin: Hopefully that sensation will pass over time.
Paula: I hope so.
I'll get used to it.
Kevin: Onward, right?
Paula: Onward and upward.
Kevin: Hey, Miguel.
How you doing?
Miguel: Hey.
How are you?
Nice to see you, sir.
Kevin: Will, how are you?
William: Good.
How you doing?
Kevin: I'm doing all right.
William: All right.
Kevin: What are we looking at here?
William: We took the old deck off, and we're gonna build a new deck right back.
And we discovered a little bit of rot here.
Kevin: So probably something to do with the door opening, flashing, and such?
William: Yes.
Kevin: What's your plan of attack?
William: So I'm just gonna cut out this section, put back some new wood, and then re-sheath it.
Kevin: Sounds straightforward.
I'll give you a hand.
Let's go.
William: Okay.
♪♪ ♪♪ ♪♪ ♪♪ Kevin: Blocking attached to the existing framing will help secure the new section of rim material that we're installing.
♪♪ We also cut out other areas that are rotted all the way through and replace them with new material.
♪♪ William: Here you go, Kevin.
Kevin: Oh.
Thank you.
William: I made the infill block.
Kevin: Yeah.
You never know what you're gonna find, right?
A couple wires there.
♪♪ William: Right there.
Okay.
So rot is out.
A couple infills.
So now we'll just add some vertical blocking to support that.
♪♪ Kevin: All right.
So we got, uh, blocking for support and nailers.
You ready to screw this in?
William: I am.
Kevin: Want to go tight there?
Yeah.
We got a little gap there, so if we could... Right there.
Okay, that's pretty good right there.
Thank you, Miguel.
Miguel: You're welcome.
Kevin: All right, so, uh, we get this screwed off... William: Okay.
Kevin: ...we're ready to keep sheathing, and then we can rebuild that porch, right?
William: That's right.
Kevin: Good deal.
All right, man.
Well, we got more coming up next time, but until then, I'm Kevin O'Connor... William: And I'm Will Nicholson.
Kevin: ...for "This Old House" here in western North Carolina.
Kevin: Next time on "This Old House"... Man: We'll show you a system that can make any building airtight.
Mark: And in my world, this is a masonry project extraordinaire.
I'm going in.
I want to see the mechanics.
Jenn: And today we're at Matt and Melinda's to talk about the trees.
Man #2: Here on this property, there were three 200-foot trees in the backyard.
They were about to fall on their house if the wind blew the wrong way.
Kevin: That's next time.


- Home and How To

Hit the road in a classic car for a tour through Great Britain with two antiques experts.


Support for PBS provided by:
Funding for THIS OLD HOUSE is provided by The Home Depot and Renewal By Andersen.